How to Grow and Care for Spider Plants: Smart Techniques for Optimal Results
- April 22, 2024
- 0 comment
Learn how to grow and care for spider plants with smart, simple techniques that ensure optimal health and results. Perfect for beginners and pros alike! Explore the ultimate guide on how to grow and care for spider plants. Spider plants are among the most popular and easiest houseplants to maintain, thriving with minimal care but responding wonderfully to a little extra attention. This guide will walk you through all the smart techniques and essential tips needed to ensure your spider plants not only survive but flourish.
Whether you’re a seasoned gardener or a curious beginner, these strategies will help you achieve optimal results with your spider plants, turning your home into a vibrant, green oasis. Dive into the world of spider plants and transform your gardening experience with foolproof methods that guarantee lush, healthy growth.
Table of Contents
- Understanding Spider Plants
- Step-by-Step Guides on How to Plant Your Spider Plant
- Routine Care and Maintenance
- Caring for Potted Spider Plants
- Advanced Growing Techniques
- Troubleshooting Common Issues
- Seasonal Care Tips
- Creative Ideas for Displaying Spider Plants
- Conclusion
- FAQs
Understanding Spider Plants

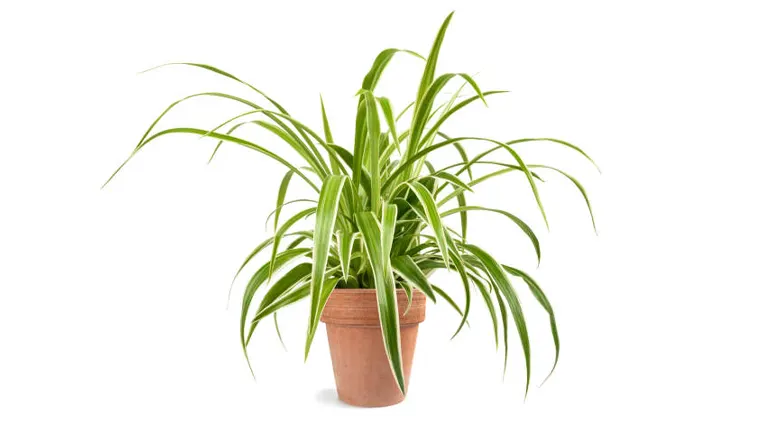
Spider plants, scientifically known as Chlorophytum comosum, are popular for their ornamental value and powerful air-purifying properties. These plants are characterized by their long, arching leaves, which can be either solid green or variegated. They are particularly adept at producing “pups” or offshoots, which makes them excellent candidates for propagation. The variegation patterns and the plant’s resilience make it a favorite among houseplant enthusiasts.
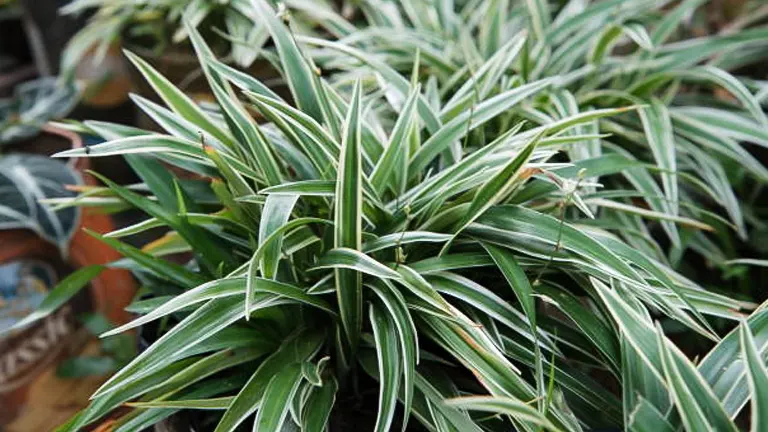
Types of Spider Plants
- Common Variegated: This variety has a single broad white stripe running down the middle of each leaf.
- Reverse Variegated: Features leaves that are green in the middle with white borders, creating a striking contrast.
- All-Green Varieties: Though less common, these are just as robust in their growth habits and are preferred by some for their lush, uniform greenery.
There are also all-green varieties that are less common but equally vigorous in their growth patterns.
Ideal Growing Conditions
To ensure optimal health and growth, spider plants require specific environmental conditions:
- Lighting: Bright, indirect light is ideal. Direct sunlight, especially in hot climates, can scorch the leaves, while too little light will cause the plant to lose its vibrant stripes.
- Temperature: The optimal temperature range for spider plants is between 60°F to 80°F (16°C to 27°C). They are quite tolerant of fluctuating temperatures, but growth will be restricted in conditions below 50°F (10°C) or above 90°F (32°C).
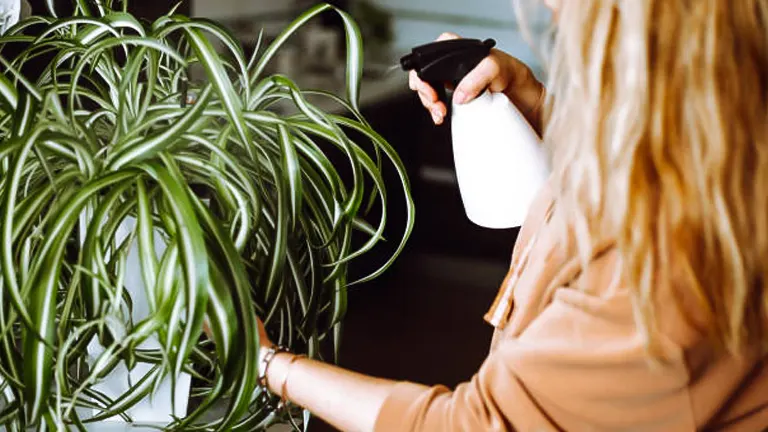
- Humidity: Spider plants prefer humidity levels of about 50% to 60%. If the air in your home is too dry, the leaf tips may become brown and crispy. Misting the plants or placing a humidifier nearby can help maintain adequate humidity levels.
Health Benefits and Air-Purifying Qualities
Spider plants are exceptional at improving indoor air quality. According to research, they have a significant capacity to absorb carbon monoxide and formaldehyde from the air, two common household toxins often emitted from furniture, synthetic fabrics, and even common household cleaners. Additionally, they remove xylene and toluene, enhancing the overall air quality and providing a healthier living environment. Their ability to produce high oxygen levels during the day also contributes to a better and healthier indoor climate.
Spider plants are not just decorative but are highly beneficial in purifying indoor air:
| Toxin | Removal Efficiency | Health Impact |
|---|---|---|
| Formaldehyde | Removes up to 90% | Irritation to nose, mouth, and throat; potential carcinogen |
| Carbon Monoxide | Moderate absorption | Reduces risk of CO poisoning |
| Xylene | Removes up to 65% | Reduces symptoms of headaches, dizziness, and nausea |
| Toluene | Removes up to 60% | Mitigates skin and respiratory system irritation |
Oxygen Production:
- Spider plants enhance the oxygen levels during daylight through photosynthesis, significantly improving indoor air quality and contributing to a healthier living environment.
Compatibility and Coexistence
Pet Safety:
- Spider plants are non-toxic to both cats and dogs, making them a safe choice for pet owners.
Plant Companions:
- Ideal companions for spider plants include moisture-loving ferns and shade-tolerant plants such as philodendrons and peace lilies. These companions help create a varied yet cohesive ecosystem that can enhance growth and visual appeal.
Additional Tips for Indoor Gardeners
- Potting Mix Recommendation: A light, well-draining mix with plenty of organic matter (peat or compost) works best.
- Fertilization Needs: Bi-monthly feeding with a balanced liquid fertilizer during the growing season (halved strength) supports lush growth.
- Pruning Practices: Regular pruning of brown or damaged leaves and spent flowers helps maintain aesthetic appeal and plant health.
Step-by-Step Guides on How to Plant Your Spider Plant
Step 1: Selecting the Right Pot
- Spider plants need pots that provide ample space for root growth and proper drainage. Select a pot that is 1-2 inches larger in diameter than the root ball of your plant. The pot should have drainage holes at the bottom; if not available, you can drill holes yourself.
- Plastic pots are lightweight and retain moisture well, which is beneficial for spider plants that thrive in moist conditions. Terracotta or clay pots are porous and allow the soil to dry more evenly, making them another excellent choice for regulating moisture.
Step 2: Preparing the Pot
- Before adding soil, place a layer of gravel, small stones, or broken pottery at the bottom of the pot. This layer will prevent soil from blocking the drainage holes and allow water to flow freely, essential for preventing root rot.
- Choose a location that will provide your spider plant with bright, indirect sunlight. Avoid direct sunlight exposure, which can scorch the leaves.
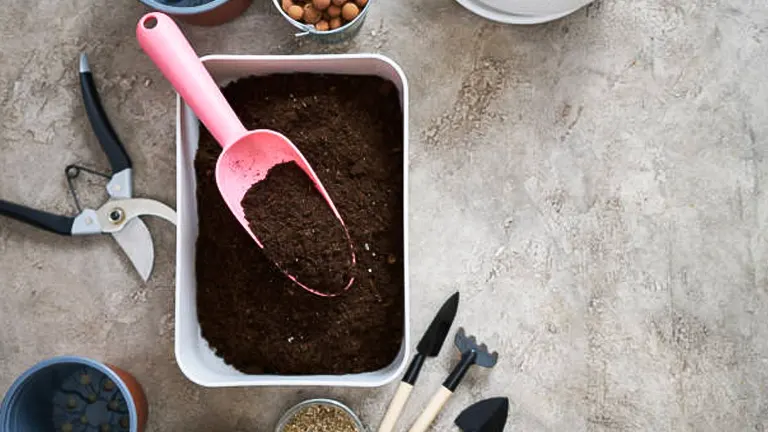
Step 3: Soil Preparation
- Use a lightweight, well-draining potting mix. Combine two parts potting soil with one part perlite, vermiculite, or coarse sand. This mixture ensures good drainage and aeration, crucial for spider plant health.
- Add enough soil mix to the pot to allow the spider plant’s crown (where the roots meet the stem) to sit at the same level as the rim of the pot. This is usually about one-third full, depending on the size of the pot and the plant.
Step 4: Planting the Spider Plant
- Gently take the spider plant out of its nursery container. Be careful not to pull directly on the leaves. Instead, tap the container’s sides and bottom to loosen the soil and roots.
- Examine the root ball. If the roots are densely packed or circling extensively, gently tease them apart with your fingers. This process encourages the roots to grow outward into the new soil.
- Set the plant in the center of the pot. Begin backfilling with your prepared soil mix, gently placing soil around the roots. Ensure the plant is upright and centered.
Step 5: Soil Adjustment
- Continue adding soil until it is level with the base of the plant where the leaves start (the crown). Tap the pot gently on your work surface to help the soil settle and eliminate large air pockets.
- Make sure the final level of the soil is about an inch below the rim of the pot. This space allows for easier watering and helps prevent water overflow.
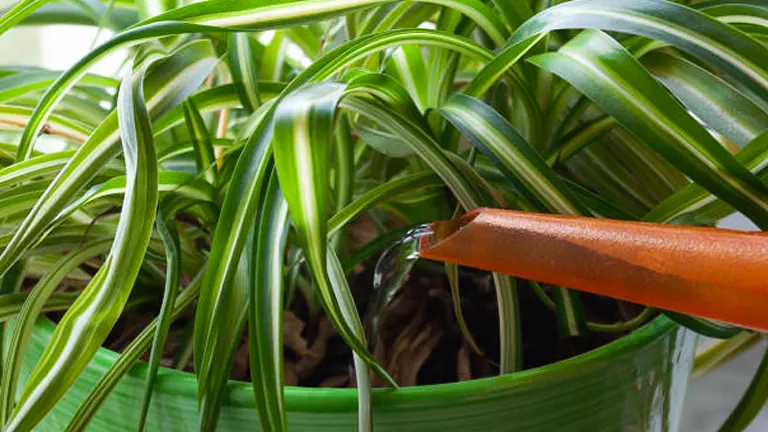
Step 6: Watering After Planting
- Once the spider plant is securely potted, water it generously to settle the remaining soil around the roots. This initial heavy watering also helps eliminate any remaining air gaps in the soil.
- Ensure that water flows freely from the drainage holes at the bottom of the pot. If water sits in the pot, it means the drainage is inadequate, and additional adjustments may be necessary.
Step 7: Placing Your Spider Plant
- Place the pot in a location that receives bright, indirect light, such as near a window with sheer curtains. Spider plants can tolerate low light but thrive best in well-lit conditions.
- Rotate the plant periodically to ensure all sides receive equal light, promoting even growth and preventing the plant from leaning towards the light source.
Initial Care
- Watering: Spider plants prefer their soil to be kept evenly moist but not soggy. Water the plant when the top inch of soil feels dry to the touch. Overwatering can lead to root rot, particularly if the potting mix does not drain well.
- Positioning: After planting, position your spider plant in moderate to bright indirect light. They can adapt to lower light conditions, but the variegation on their leaves will be more pronounced if they receive plenty of light. Avoid direct sunlight as it can scorch their leaves.
Post-Planting Tips
- Feeding: Wait about 4 to 6 weeks before starting a regular feeding routine. Use a balanced, water-soluble fertilizer, diluted to half the recommended strength, once per month during the spring and summer.
- Adjustments: Monitor your spider plant’s response to its new environment. If the leaves begin to brown at the tips, this could be a sign of fluoride sensitivity, common in many municipal water supplies. Switching to distilled or non-fluoridated water can prevent this issue.
Routine Care and Maintenance
Watering Requirements
Spider plants need a balanced watering approach to thrive. They prefer the soil to be moist, but not waterlogged, requiring you to let the top inch of soil dry out before watering again. This method prevents overwatering and the risk of root rot, which is crucial for their health. Watering frequency will depend heavily on the environmental conditions and the season—more frequent in hot, dry weather and reduced in cooler, humid conditions.
Optimal Lighting Conditions
Proper lighting is essential for spider plants to flourish. They thrive in bright, indirect sunlight, which helps them produce their characteristic vibrant stripes. Direct sunlight, however, should be avoided as it can scorch their leaves, leading to brown tips and less vigorous growth. If natural light is limited, placing them near a north or east-facing window is usually ideal. Alternatively, artificial grow lights can also provide sufficient light, especially in darker rooms.
Pruning and Cleaning
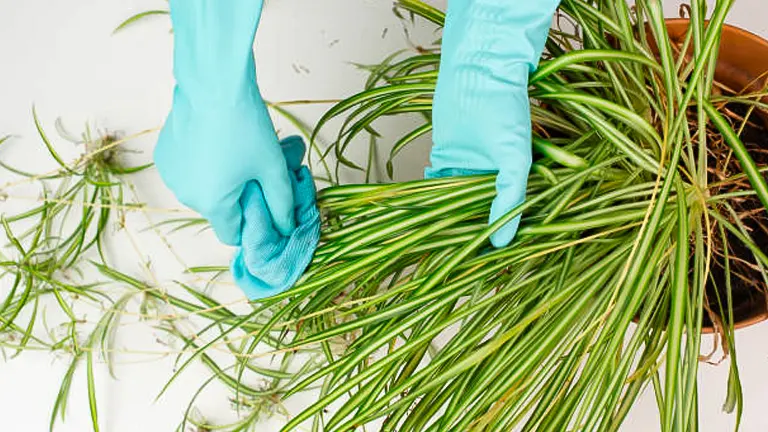
Regular pruning helps maintain a spider plant’s health and aesthetic appeal. Remove any brown or yellow leaves at the base to encourage new growth and improve air circulation around the plant. Additionally, wiping the leaves with a damp cloth can remove dust and other particulates, enhancing the plant’s ability to photosynthesize efficiently.
Temperature and Humidity Control
Spider plants prefer temperatures between 65°F to 80°F (18°C to 27°C) and moderate humidity levels around 50-60%. If your home is dry, especially in winter months, using a humidifier or placing the plant on a water-filled pebble tray can increase the surrounding humidity. Consistent conditions without extreme changes are ideal for keeping spider plants healthy.
Caring for Potted Spider Plants
Pot Selection and Soil Considerations

Choosing the right pot and soil for spider plants is crucial for their health and growth.
- Pot Selection: Pots with drainage holes are essential, as spider plants are susceptible to root rot if waterlogged. A pot that is 1-2 inches larger than the plant’s root ball is ideal to accommodate growth. Materials can vary:
- Plastic pots are lightweight and retain moisture well, which can be beneficial in dry conditions.
- Terracotta pots are porous, allowing the soil to dry more evenly and breathe, which is great for moisture regulation in humid environments.
- Soil Needs: Use a well-draining potting mix designed for houseplants. Mixing in perlite or coarse sand can improve drainage, a critical factor in preventing root diseases. The pH should ideally be between 6.0 and 7.2, slightly acidic to neutral.
Planting in the Pot
- Layer the Bottom: Begin by layering small stones or gravel at the bottom of the pot before adding soil. This layer improves drainage and prevents soil from clogging the drainage holes.
- Add Soil and Plant: Fill the pot partially with your potting mix, place the spider plant in the pot, and add soil around the roots until it is secure. Be sure the crown of the plant (where the roots meet the stem) is just below the top of the soil.
- Initial Watering: Once planted, water the plant thoroughly to settle the soil around the roots and help eliminate air pockets. Allow the water to drain completely.
Watering Strategy for Potted Plants: Watering needs vary based on environmental conditions, but a general rule for potted spider plants is to water once the top inch of soil feels dry to the touch. During the growing season (spring and summer), you may need to water more frequently, especially if the plant is in a warmer, sunnier location. Reduce watering in the winter when the plant’s growth slows down.
Feeding: Feed spider plants every month during the spring and summer with a balanced, water-soluble fertilizer diluted to half the recommended strength. Over-fertilizing can lead to salt buildup in the soil, which can damage the roots and cause browning leaf tips. Always water the soil before applying liquid fertilizer to avoid root burn.
Re-potting Tips: Re-potting is typically needed every two to three years or when the plant outgrows its pot. Signs that a spider plant needs re-potting include:
- Roots growing through the drainage holes.
- Water standing on the top of the soil because it can’t penetrate the root mass.
- The plant drying out more rapidly than usual.
To re-pot, gently remove the plant from its current container, prune any dead or excessively long roots, and follow the planting steps with fresh potting mix in a new pot that is slightly larger than the old one.
Advanced Growing Techniques
Fertilization Strategies: To maximize the health and aesthetic appeal of spider plants, proper fertilization is key. Here’s how to do it right:
- Type of Fertilizer: Use a balanced, water-soluble fertilizer (such as a 10-10-10 NPK ratio) which will provide the necessary nutrients without overwhelming the plant. Organic options such as fish emulsion or seaweed extract are also effective and can promote more natural growth patterns.
- Frequency of Application: Fertilize every month during the growing season (spring through early fall). In the winter, reduce fertilization to every other month or pause altogether, as the plant’s growth slows down and its nutrient requirements decrease.
- Application Method: Dilute the fertilizer to half the strength recommended on the package to prevent nutrient burn. Apply the fertilizer evenly around the base of the plant, ensuring not to pour directly on the leaves or center of the plant to avoid damage.
Propagation Methods: Spider plants are particularly prolific propagators, which makes them rewarding and fun to grow. To propagate a spider plant:
- Through Offsets (Spiderettes):
- Wait until the baby spider plants (spiderettes) have developed their own roots, which usually occur when they are still attached to the mother plant.
- Cut the spiderettes off using clean scissors or shears.
- Plant them in their own pots with the same type of soil as the mother plant, ensuring the roots are well covered.
- Water the new plants thoroughly and place them in indirect light. They should start to establish and grow rapidly.
- Through Division:
- This method is best performed in the early spring, coinciding with repotting.
- Remove the plant from its pot and gently separate the root ball into smaller sections, each with several leaves and ample roots.
- Re-pot each section into its own container, following the same soil and planting guidelines as for new plants.
Pest and Disease Management: Keeping your spider plants healthy involves proactive pest and disease management. Here are common issues and how to handle them:
- Pests: Spider plants may occasionally fall prey to aphids, mealybugs, and spider mites. An early sign is sticky residue on the leaves or tiny webbings under the leaf corners.
- Control Measures: Wipe off the pests using a damp cloth dipped in soapy water or apply an appropriate insecticidal soap. For organic control, neem oil is effective against a wide range of pests and also helps prevent fungal issues.
- Diseases: Root rot and leaf-tip burn are the most common diseases.
- Root Rot Prevention: Ensure the pot has good drainage and the soil is not overly compacted. Avoid overwatering, especially in cooler months.
- Leaf-Tip Burn Solution: This is often caused by fluoride or chlorine in tap water, or by excessive fertilization. Use distilled or non-fluoridated water for irrigation, and ensure fertilizer is applied correctly and in moderation.
Troubleshooting Common Issues
Managing Browning Leaf Tips: Browning leaf tips in spider plants are often a telltale sign of certain environmental stressors, such as over-fertilization, poor water quality, or low humidity:
- Fluoride Sensitivity: Spider plants are sensitive to fluoride, commonly found in tap water. Use rainwater or distilled water for irrigation to prevent the tips of the leaves from turning brown.
- Salts in the Fertilizer: Excessive use of synthetic fertilizers can lead to salt buildup, which may also cause brown tips. To alleviate this, flush the soil with distilled water every few months to wash away accumulated salts.
- Humidity Levels: If the air is too dry, spider plants can show their displeasure through browned leaf tips. Increasing room humidity around the plant can help; consider using a humidifier or placing the plant on a pebble tray filled with water.
Stunted Growth and Other Concerns: If your spider plant isn’t growing as expected or seems generally unhappy, consider these factors:
- Light Exposure: Insufficient light is a common culprit for stunted growth. Although spider plants can tolerate low light, they thrive in bright, indirect sunlight. Consider relocating your plant to a brighter area, but avoid direct sunlight which can scorch the leaves.
- Watering Issues: Both overwatering and underwatering can stress the plant, leading to poor growth and a wilted appearance. Ensure the plant’s soil is moist but not soggy. Allow the top inch of soil to dry out before watering again.
- Pot Bound: A spider plant that has outgrown its pot can become pot-bound, where roots fill the pot and can’t absorb nutrients efficiently, inhibiting growth. If roots are visible at the soil surface or through drainage holes, it’s time to repot into a slightly larger container.
Leaf Curl and Droopiness: Leaf curl in spider plants can be due to a few different issues, including watering habits, exposure to extreme temperatures, or pest problems:
- Improper Watering: Overwatering is a common issue, especially in pots without adequate drainage. Conversely, underwatering during hot weather can cause leaves to curl and droop as the plant tries to conserve moisture.
- Temperature Stress: Spider plants prefer consistent temperatures and can react to extreme cold or heat by curling their leaves. Keep plants away from drafty windows in winter and air conditioning vents in summer to avoid sudden temperature changes.
- Pest Intrusion: Check the undersides of the leaves for signs of pests like spider mites or aphids. Infestations can cause leaves to curl and lose their vigor. Treat infestations early with insecticidal soap or neem oil, applying as directed on the product label.
Seasonal Care Tips
Winter Care Strategies: During the colder months, spider plants require specific care adjustments to maintain their health and vitality.
- Reduced Watering: As growth slows in winter, reduce watering frequency to prevent soil waterlogging, which can lead to root rot. Allow the soil to dry out more thoroughly between waterings, but don’t let it become completely parched.
- Light Maximization: With shorter daylight hours, maximize available light. Move plants closer to windows but watch for cold drafts, which can harm them. If natural light is insufficient, consider supplemental lighting with a grow light.
- Temperature Control: Keep the environment warm, ideally above 50°F (10°C), as cold temperatures can be detrimental. Avoid placing plants near cold drafts or chilling windowsills.
Summer Maintenance: In contrast, summer brings about a different set of care requirements for spider plants.
- Increased Watering: The warmer months will likely necessitate increased watering frequencies. However, it’s vital to ensure that the plant doesn’t sit in water. Use well-draining soil and pots to help manage excess moisture.
- Sunlight Protection: While spider plants appreciate more light, they should be protected from the harsh midday sun. Bright, indirect light is perfect. If situated outdoors or on a balcony, ensure some shade is available during peak sunlight hours.
- Humidity and Feeding: Summer is a good time to mist your plants occasionally to boost humidity, especially in dry climates. It’s also the optimal season for fertilizing; continuing a diluted, balanced feed once a month can support lush growth.
Creative Ideas for Displaying Spider Plants
- Utilizing Hanging Baskets: Spider plants excel in hanging baskets, which allow their arching leaves and baby plantlets to dangle attractively. Choose a basket that complements your decor and ensure it has good drainage. Hanging your spider plant can also prevent pets from disturbing it.
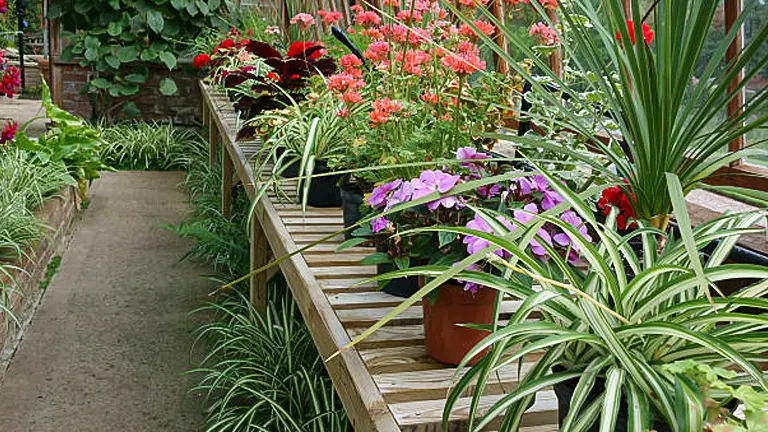
- Shelf Styling: Arranging spider plants on shelves can enhance an indoor garden’s aesthetics. Use decorative pots and vary the shelf levels to create an appealing display that allows each plant enough space and light to thrive.
- Companion Planting: Spider plants get along well with other houseplants that prefer similar light and water conditions. Ferns, philodendrons, and peace lilies can be great companions, creating a varied yet cohesive plant display.
Related Post
- How to Fertilize a Mango Tree Effectively: Tips and Tricks for Healthy Growth
- How to Fertilize Apple Trees: Essential Tips for a Bountiful Harvest
- How to Fertilize Lemon Trees: Secrets for Thriving Citrus
- How to Fertilize Avocado Tree: A Step-by-Step Guide for Lush Growth
- How to Fertilize Bougainvillea: A Complete Guide for Stunning Blooms
Conclusion
Cultivating spider plants offers a rewarding opportunity to enhance both the aesthetics and the air quality of your indoor spaces. With their minimal care requirements and robust nature, these plants are an excellent choice for both novice and experienced gardeners alike. By applying the straightforward and effective cultivation techniques discussed, you can ensure your spider plants thrive, providing lush greenery and a touch of nature to your home or office. Whether you are starting your first plant or looking to refine your gardening skills, spider plants stand out as a versatile and gratifying addition to your horticultural pursuits.
FAQs
- What is the best way to water spider plants to promote healthy growth?
Spider plants prefer even moisture. Water them thoroughly, allowing the top inch of soil to dry out between waterings. During growth periods, keep the soil consistently moist but not waterlogged. Reduce watering in the dormant winter months. - How do I know if my spider plant is getting too much light?
If the spider plant’s leaves begin to scorch or fade in color, especially turning pale or developing brown tips, it might be receiving too much direct sunlight. These plants thrive in bright, indirect light. Shielding them with a sheer curtain or placing them a few feet away from a south-facing window can help mitigate excessive light exposure. - Can spider plants survive in artificial light?
Yes, spider plants can grow well under artificial lighting, making them ideal for offices or rooms with little natural light. Fluorescent lights or grow lights placed a few feet above the plants can provide the necessary spectrum of light they need for photosynthesis and growth. - What are the common pests that affect spider plants and how can I deal with them?
Spider plants are susceptible to pests like spider mites, aphids, and mealybugs. To combat these, regularly inspect the plant’s undersides and crevices; wipe the leaves with a damp cloth soaked in soapy water or apply neem oil as a natural pesticide. Keeping the plant healthy and maintaining proper humidity levels also reduces the likelihood of infestations. - Why are the tips of my spider plant turning brown and how can I prevent this?
Brown tips can be a sign of fluoride toxicity, dry soil, or low humidity. To prevent this, water your plants with distilled or non-fluoridated water, ensure the soil remains evenly moist, and maintain adequate humidity around the plant. Misting the leaves occasionally or using a pebble tray can also help. - Is it necessary to fertilize spider plants? If so, what type and how often?
While spider plants are not heavy feeders, fertilizing them can help support their growth. Use a balanced, water-soluble fertilizer diluted to half strength, once a month during the growing season (spring through summer). Avoid fertilizing in the winter when the plant’s growth naturally slows. - How often should spider plants be repotted?
Spider plants should be repotted every 2-3 years or when they become root-bound. Signs that your plant needs repotting include roots growing through the drainage holes and soil drying out rapidly after watering. Use a slightly larger pot each time to give the roots plenty of room to expand. - Can I use tap water to water my spider plant, or is there a better alternative?
While tap water is generally okay, it can sometimes contain fluoride and other chemicals that may cause tip burn in spider plants. Using distilled, rain, or filtered water can prevent these issues and support healthier plant growth. If tap water must be used, letting it sit out overnight before watering can help dissipate some chemicals.
Now that you’ve got the know-how, growing and caring for spider plants will be a breeze. Just stick to the basics we’ve covered, and you’ll have thriving plants adding green charm to your space in no time. Happy planting!

Kristine Moore
Forestry AuthorI'm Kristine Moore, a seasoned garden landscaping professional with over 30 years of experience. My extensive career has been dedicated to transforming outdoor spaces into stunning, sustainable landscapes. With a deep understanding of horticulture, design principles, and environmental stewardship, I have become a respected figure in the field, known for creating harmonious, visually appealing, and eco-friendly gardens. My commitment to excellence and continuous learning in landscaping trends and techniques has solidified my reputation as an expert in garden design and implementation.


Leave your comment