How to Fertilize Pepper Plants for Thriving Growth: Best Timing, Techniques, and Expert Tips
- April 15, 2024
- 0 comment
Discover how to fertilize pepper plants for unmatched growth. Master the optimal times, techniques, and tips with our expert guide to maximize harvest. Growing pepper plants can be incredibly rewarding. These vibrant and flavorful vegetables thrive with proper care, particularly when it comes to fertilization. This guide will walk you through the essential steps of fertilizing pepper plants to ensure thriving growth, covering the best timing, techniques, and expert tips tailored specifically for maximizing your pepper harvest.

This guide will walk you through the essential steps of fertilizing pepper plants to ensure thriving growth, covering the best timing, techniques, and expert tips tailored specifically for maximizing your pepper harvest.
Table of Contents
- Understanding Pepper Plant Nutrition
- Choosing the Right Fertilizer
- Planting Strategies for Optimal Fertilization
- Fertilizing Techniques and Timing
- Step-by-Step Guide on How to Fertilize Pepper Plants
- Advanced Growth Techniques
- Monitoring Plant Health and Adjusting Practices
- Common Mistakes to Avoid in Fertilizing Pepper Plants
- Conclusion
- FAQs
Understanding Pepper Plant Nutrition
Nutrient Essentials Explained
Pepper plants thrive on a complex diet that includes both macro and micronutrients, each contributing to various physiological functions within the plant. Here’s a closer look at how these nutrients support plant health and development:
- Nitrogen (N): A key component of chlorophyll, the green pigment responsible for photosynthesis, nitrogen is vital for plant growth. It’s also a major part of amino acids, the building blocks of proteins. An optimal nitrogen level promotes vigorous growth of leaves and stems, making it indispensable during the early growth stages.
- Phosphorus (P): Essential for the transfer of energy within the plant, phosphorus is involved in several key processes, including photosynthesis, nutrient movement, and the transformation of sugars and starches. It stimulates root development and increases bloom quality, directly influencing fruit yield.
- Potassium (K): Potassium regulates plant metabolism and activates enzymes used in photosynthesis and energy production. It improves water use, enhances resistance to drought, diseases, and pests, and is critical for the development of strong and healthy fruits.
Beyond these, calcium (Ca) strengthens plant cell walls, magnesium (Mg) is at the heart of the chlorophyll molecule, and sulfur (S) is a component of vitamins and essential amino acids. Micronutrients like iron (Fe), manganese (Mn), and zinc (Zn), though required in smaller amounts, play critical roles in enzymatic functions and overall plant health.
Essential Nutrients, Their Functions, and Deficiency Symptoms
| Nutrient | Function | Deficiency Symptoms |
|---|---|---|
| Nitrogen (N) | Leaf and stem growth | Yellowing of older leaves |
| Phosphorus (P) | Root development, bloom quality | Dark, purplish leaves; stunted growth |
| Potassium (K) | Water use, disease resistance | Yellowing of leaf edges; scorching |
| Calcium (Ca) | Cell wall strength | Blossom end rot; weak stems |
| Magnesium (Mg) | Photosynthesis | Leaf chlorosis starting from edges |
| Sulfur (S) | Protein synthesis | Light green coloration of leaves |
| Iron (Fe) | Chlorophyll synthesis | Yellowing between leaf veins |
| Manganese (Mn) | Enzyme activation | Pale spots on young leaves |
| Zinc (Zn) | Hormone synthesis, enzyme function | Leaf deformation, reduced leaf size |
Identifying Nutritional Deficiencies
Recognizing the early signs of nutrient deficiency allows for prompt correction, preventing stress that can impact yield and quality. Here’s an enhanced guide to diagnosing common deficiencies:
- Nitrogen deficiency: First appears as a uniform yellowing of older leaves because nitrogen is mobile within the plant and is reallocated to new growth when in short supply.
- Phosphorus deficiency: Apart from darkening and purplish discoloration, phosphorus-starved plants may exhibit delayed maturity and reduced fruit set.
- Potassium deficiency: Symptoms often start at the leaf margins and tips, which may become scorched or curled. Potassium is crucial for fruit quality; deficiency may result in small, poorly colored fruits.
Scientific Insight for Optimal Fertilization
To effectively address these nutritional needs, fertilization strategies must be precise. For instance, nitrogen application should be reduced as the plant transitions to flowering and fruiting stages to prevent excessive vegetative growth at the expense of fruit production. Research suggests that a balanced fertilization approach that gradually shifts the nutrient ratio in favor of phosphorus and potassium can significantly enhance fruit yield and quality.
Moreover, applying micronutrients in the correct forms and amounts is vital. For example, chelated forms of iron and manganese ensure better absorption by the plant, especially in alkaline soils where these elements become less available.
Choosing the Right Fertilizer
Types of Fertilizers
The health and productivity of your pepper plants are significantly influenced by the type of fertilizer you choose. Understanding the differences between organic and synthetic fertilizers is crucial for making an informed decision that aligns with your gardening practices and plant needs.
- Organic Fertilizers: Derived from natural materials such as compost, manure, bone meal, and cottonseed meal, these fertilizers offer a multifaceted benefit to your garden:
- Nutrient Release: They typically release nutrients slowly, ensuring a long-term supply without the risk of sudden nutrient spikes that could harm your plants.
- Soil Health: Organic matter significantly enhances soil structure, increases water retention, and fosters beneficial microbial activity, all of which improve plant health.
- Environmental Impact: These fertilizers are environmentally friendly, promoting sustainable gardening practices.
- Synthetic Fertilizers: These fertilizers are commercially manufactured to provide nutrients in a more controlled and immediate form:
- Rapid Availability: Designed to release nutrients quickly, synthetic fertilizers are ideal for correcting deficiencies in a short period.
- Concentration: They are generally more concentrated than organic options, which means they require careful application to avoid plant burn.
- Application Diversity: Available in various forms such as granules, powders, and liquid solutions, allowing for flexible application methods tailored to the plant’s growth stages.
Comparison of Fertilizer Types
| Type | Nutrient Release Rate | Nutrient Use Efficiency | Environmental Impact | Typical N-P-K Ratio | Best Use Scenario |
|---|---|---|---|---|---|
| Organic | Slow (varies by source; typically weeks to months) | Moderate (Depends on microbial activity in soil) | Low impact (Enhances soil structure, promotes microbial diversity, reduces runoff) | Variable (Commonly lower and balanced ratios like 5-5-5) | Enhancing soil fertility over time, building organic matter, general growth phases |
| Synthetic | Fast (Immediate to several days) | High (Directly available to plants, but can leach quickly) | High impact (Potential for nutrient runoff and soil acidification) | High and targeted (e.g., 20-10-10 for growth boost, 10-20-20 for flowering) | Quick correction of deficiencies, specific growth stages requiring immediate nutrient availability |
Recommended Products and Their Uses
Selecting the right fertilizer product depends on the specific developmental stage and nutritional needs of your pepper plants:
- Balanced Fertilizers (10-10-10 NPK Ratio):
- Use Case: Ideal for general maintenance throughout the growth cycle, supporting foliage, roots, and fruits equally.
- Benefits: Ensures consistent supply of essential nutrients which promote overall health and vigorous growth.
- Slow-Release Fertilizers (Osmocote Smart-Release, Miracle-Gro Performance Organics):
- Use Case: Best used at the planting stage and as a seasonal top-up to provide a steady nutrient supply over months.
- Benefits: Minimizes the risk of nutrient leaching and provides continuous nutrition, which is crucial for prolonged growth phases.
- High-Phosphorus Fertilizers (5-10-5 NPK Ratio):
- Use Case: Recommended during the flowering and early fruit-setting stages to stimulate root development and bloom production.
- Benefits: Enhances the quality and quantity of fruit, crucial for yielding a successful crop.
Understanding Fertilizer Labels
Fertilizer labels contain critical information that helps gardeners apply the correct amounts efficiently and safely:
- NPK Values: Indicate the percentages of Nitrogen (N), Phosphorus (P), and Potassium (K) by weight.
- Example: An NPK value of 10-10-10 means the fertilizer contains 10% of each nutrient.
- Application Rates: Detailed instructions on how much fertilizer to use per square foot of soil area.
- Scientific Insight: Applying more than 0.9 pounds of nitrogen per 1000 square feet can risk nitrogen leaching, especially in sandy soils or during heavy rainfall.
- Frequency of Application: Recommendations on how often to apply the fertilizer, which can vary from weekly to monthly, depending on the product’s nutrient release rate and the plant’s growth stage.
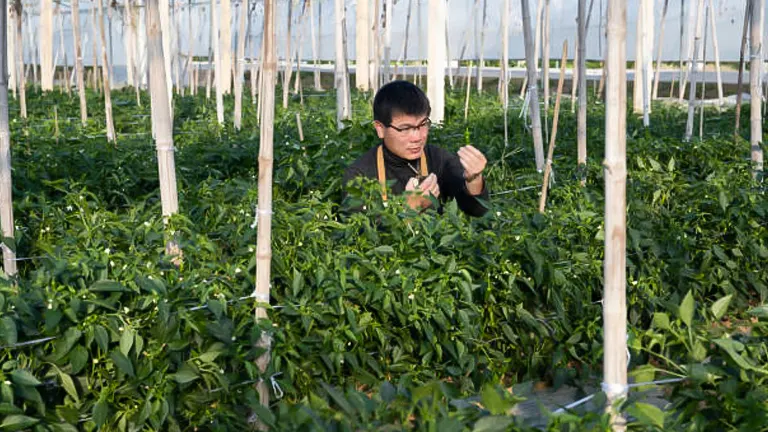
Planting Strategies for Optimal Fertilization
Spacing and Density
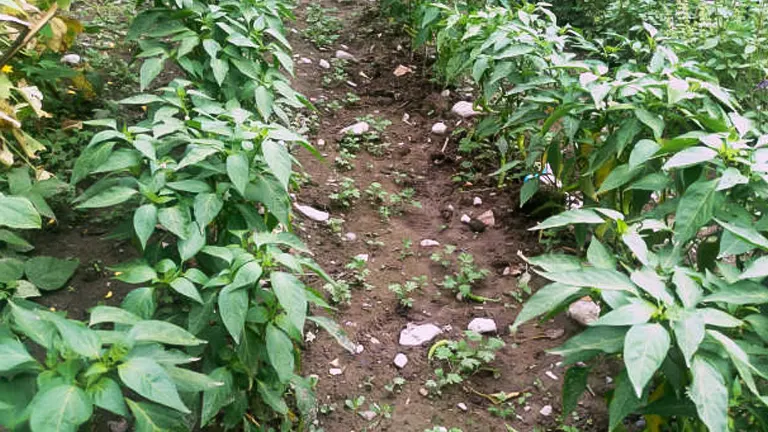
Proper plant spacing is critical not only for growth but also for the effective application of fertilizers. Here’s a detailed breakdown:
- Standard Garden Spacing:
- Distance Between Plants: 18-24 inches apart.
- Distance Between Rows: 24-36 inches apart.
- Benefits: This spacing allows for adequate air circulation, which helps in minimizing the risk of fungal diseases. It also provides enough space for each plant to access sufficient sunlight and nutrients.
- High-Density Farming:
- Distance Between Plants: 12-18 inches apart.
- Optimal for: Maximizing yield in limited space scenarios such as urban gardens or commercial farms.
- Considerations: Requires more meticulous water and nutrient management to prevent competition among plants and ensure health and productivity.
Advanced High-Density Farming Techniques
High-density planting strategies can significantly influence the efficiency of fertilization through targeted delivery systems and soil management practices:
- Drip Irrigation and Fertigation:
- Function: Delivers water and soluble fertilizers directly to the plant roots via drip lines, ensuring minimal wastage.
- Advantages: Highly efficient in water and nutrient use; reduces the risks of surface water runoff and nutrient leaching.
- Scientific Insight: Studies have shown that fertigation can increase nutrient uptake efficiency by up to 90% compared to conventional top-dressing methods.
- Raised Beds:
- Purpose: Elevates the planting area to improve drainage and soil quality.
- Benefits: Facilitates even fertilizer application and prevents soil compaction, which can hinder root growth and nutrient absorption.
- Effectiveness: Raised beds can enhance root zone conditions, which improves nutrient uptake efficiency and can lead to a 20-30% higher yield compared to traditional flat beds.
Integrating Technology in High-Density Plantings
Utilizing modern agricultural technologies can further optimize fertilization in dense plantings:
- Soil Sensors: Employing soil moisture and nutrient sensors can provide real-time data to fine-tune irrigation and fertigation schedules, ensuring plants receive precise nutrient amounts when needed.
- Automated Systems: Automated fertigation systems can adjust the frequency and amount of nutrients delivered based on the developmental stage of the plants, which maximizes efficiency and reduces nutrient waste.
Fertilizing Techniques and Timing
Application Methods
The method by which you apply fertilizer can significantly impact the effectiveness of the nutrient uptake and overall plant health:
- Broadcasting: This method involves spreading fertilizer evenly across the soil surface and is typically done before planting seeds or setting transplants. It is especially useful for large areas where manual application would be inefficient.
- Banding: By placing fertilizer in strips beside or below the seed rows, banding helps concentrate the nutrients in the vicinity of the plant roots, improving their availability. This method is particularly effective at planting time and can be used during early growth to support developing roots.
- Foliar Feeding: This involves spraying liquid fertilizer directly onto the plant leaves. It is used primarily for quick corrections of micronutrient deficiencies as leaves can absorb nutrients rapidly. However, it should be complemented with soil applications since not all necessary nutrients can be effectively delivered through leaves.
- Fertigation: Combining fertilization with irrigation, this method uses a drip system to deliver a soluble fertilizer solution directly to the plant roots. It provides excellent control over nutrient dosage and timing, making it ideal for precise nutrient management, especially in high-density plantings.
Fertilizer Application Methods and Their Impacts
| Method | Mechanism | Efficiency | Best Use Phase | Nutrient Uptake Rate | Application Rate | Notes |
|---|---|---|---|---|---|---|
| Broadcasting | Surface application | Moderate | Pre-planting, Mid-season | 50-70% | 1-2 lbs per 100 sq ft | Requires soil incorporation |
| Banding | Targeted application | High | Planting, Early Growth | 80-90% | 1-1.5 lbs per 100 sq ft | Minimizes contact with seeds |
| Foliar Feeding | Leaf absorption | Very High | All Phases (as needed) | 90-100% within hours | 0.1-0.5 lbs per 100 sq ft | Quick correction of deficiencies |
| Fertigation | Through irrigation | Very High | Continuous application | 85-95% | 1-2 lbs per 100 sq ft | Even and efficient nutrient supply |
Optimal Fertilization Schedule
Timing your fertilizer applications can make a significant difference in your plants’ health and the quality of the yield:
- At Planting: Incorporate a balanced, slow-release fertilizer into the soil to provide a steady supply of nutrients as the plants establish. This initial feeding should support the plant for several weeks.
- Pre-Flowering: Just before the plants start to flower, apply a high-phosphorus fertilizer to promote robust root and flower development. This is crucial for setting the stage for fruit production.
- Fruit Setting: As flowers begin to give way to fruits, switch to a potassium-rich fertilizer to enhance fruit development. Potassium improves the size, color, and taste of the peppers.
- Maintenance: Throughout the growing season, continue to apply a balanced fertilizer every 4-6 weeks, depending on the plant’s response and soil nutrient levels. Regular feeding supports continuous growth and fruit production.
Step-by-Step Guide on How to Fertilize Pepper Plants
Step 1: Testing the Soil
Before you plant your peppers, it’s essential to understand the soil’s current nutrient content and pH level:
- Conduct a Soil Test: Use a home testing kit or send a soil sample to a local extension service. Aim to identify levels of nitrogen (N), phosphorus (P), potassium (K), and the pH level.
- Evaluate Soil Texture and Structure: This affects water retention and nutrient availability.
- Adjust the Soil pH: If necessary, modify the soil pH to between 6.0 and 6.8 using lime (to increase pH) or sulfur (to decrease pH) to optimize nutrient uptake.
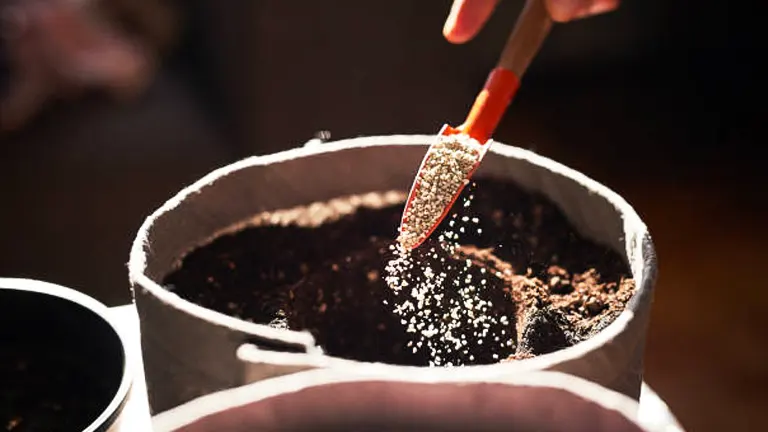
Step 2: Choosing Your Fertilizer
Select a fertilizer that matches the needs of your pepper plants:
- Type of Fertilizer:
- Organic fertilizers (compost, fish emulsion, blood meal) are slower-releasing but improve soil health.
- Synthetic fertilizers provide quick-release nutrients that are easy to control and can be crucial after transplanting.
- N-P-K Ratio: Look for a fertilizer with a balanced ratio such as 10-10-10, or a formulation higher in Phosphorus and Potassium if you are preparing for flowering and fruiting stages.
Step 3: Fertilizing Before Planting
Incorporate fertilizer into the soil to prepare for planting:
- Mix Fertilizer with Soil: Use a garden tiller or fork to mix the fertilizer evenly with the soil.
- Application Rate: Generally, applying about 2-3 pounds of a balanced 10-10-10 fertilizer per 100 square feet is recommended. Adjust based on soil test results.
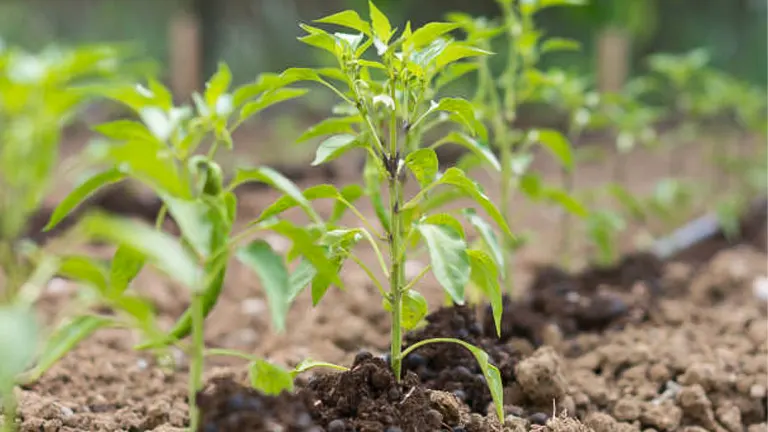
Step 4: Fertilizing After Planting
Post-planting fertilization depends on the plant’s growth stage and observed needs:
- Initial Application: Two weeks after planting your peppers, apply a nitrogen-rich fertilizer to help establish strong roots and healthy foliage.
- Continuous Feeding: Every 4-6 weeks, side-dress the plants with additional fertilizer. Reduce the amount of nitrogen if you observe excessive leaf growth over fruit production.
Step 5: Special Considerations During Flowering and Fruiting
Adjust your fertilization strategy as your plants move into the flowering and fruiting phases:
- Increase Phosphorus and Potassium: Switch to a fertilizer higher in P and K to promote strong flower development and fruit growth. A ratio like 5-10-10 is suitable.
- Application Technique: Apply granular fertilizer around the base of each plant, approximately 6 inches from the stem to avoid direct contact that could cause burn.
Step 6: Monitoring and Adjusting
Regular observation will guide your ongoing fertilization practices:
- Watch for Signs of Deficiency or Excess: Yellowing leaves (nitrogen deficiency), dark green or purple leaves (phosphorus deficiency), and brown edges (potassium deficiency) indicate nutrient imbalances.
- Adjust Frequency and Quantity: Depending on the weather conditions, plant performance, and soil test results, you may need to increase or decrease the frequency and quantity of fertilizer application.
Step 7: End of Season Care
As the growing season winds down, prepare your plants for dormancy:
- Reduce Fertilizer Application: Stop fertilizing about 2 months before the first expected frost to allow your plants to harden off.
- Clean Up Debris: Remove old mulch and plant debris to reduce the risk of disease over winter.
Advanced Growth Techniques
Pruning Practices
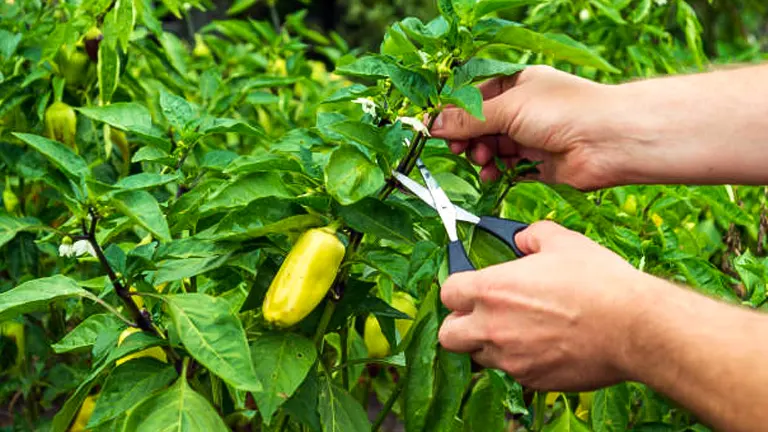
Pruning is essential not just for maintaining plant structure and aesthetics but also for enhancing the effectiveness of your fertilization strategy by improving air circulation and light penetration, which are vital for healthy growth:
- Why Prune: Reducing the number of leaves and stems allows more energy to be directed towards fruit production. It also helps in disease prevention by improving airflow, which reduces humidity around the plant—a key factor in many fungal diseases.
- How to Prune: For pepper plants, remove any leaves that touch the ground as well as interior leaves that block light to the center of the plant. Also, trim off any diseased or dead branches to keep the plant healthy. During the fruiting phase, you might also want to prune some of the fruit buds to encourage larger peppers rather than a greater quantity of smaller fruits.
Soil Management
Maintaining soil health is crucial for effective fertilization and robust plant growth:
- Soil Testing: Before beginning your planting and annually thereafter, test your soil to determine its nutrient content and pH level. This will help you tailor your fertilization plan to meet the specific needs of your soil and plants.
- Adjusting pH: Peppers prefer a soil pH between 6.0 and 6.8. If your soil test indicates a pH outside this range, adjust it using lime (to raise pH) or sulfur (to lower pH) to optimize nutrient availability.
- Enhancing Soil Structure: Adding organic matter such as compost or peat moss can improve soil structure, enhance nutrient-holding capacity, and encourage beneficial microbial activity.
Monitoring Plant Health and Adjusting Practices
Observation Techniques
Consistent monitoring is key to adapting fertilization practices to the actual needs of your pepper plants. This proactive approach helps in recognizing potential problems before they become severe.
- Visual Inspection: Regularly examine your plants for signs of nutrient excess or deficiency, pest infestation, and diseases. Look for changes in leaf color, size, and shape, as well as flower and fruit development, which can all indicate nutritional issues.
- Leaf Symptoms: Yellowing leaves, especially older ones, can indicate a nitrogen deficiency, while purple-tinged leaves might suggest a phosphorus shortage. Brown edges or tips often point to potassium deficiency.
- Growth Patterns: Stunted growth can frequently be traced back to insufficient nutrient supply, compacted soil, or a root system issue. Conversely, excessively lush foliage with few fruits typically indicates over-fertilization, particularly with nitrogen.
Adjusting Fertilization Based on Observations
- Soil Tests: Conduct soil tests periodically to get accurate readings on pH levels and the concentrations of crucial nutrients. This data can guide your adjustments to fertilizer types, amounts, and application intervals.
- Tailored Application: If tests indicate nutrient deficiencies, increase the specific nutrients needed. Conversely, reduce fertilizer application if there is evidence of nutrient burn or leaching.
- Responsive Feeding: Adjust your fertilization schedule based on the plant’s growth stage, health, and the prevailing weather conditions. For instance, reduce fertilizer rates in extremely hot or dry periods to prevent stress on the plants.
Common Mistakes to Avoid in Fertilizing Pepper Plants
To maximize the growth and health of your pepper plants, be aware of these frequent fertilization errors:
- Over-Fertilization: Applying too much fertilizer can lead not only to nutrient burn (evidenced by scorched-looking leaf edges) but also to imbalanced plant nutrition that can inhibit absorption of other essential elements. Always adhere to the recommended rates and observe plant response carefully.
- Neglecting pH and Moisture Levels: Soil pH significantly affects nutrient availability. A pH that is too high or too low can lock out essential nutrients, making them inaccessible to your plants. Similarly, inconsistent moisture levels can affect nutrient uptake, particularly in sandy soils that dry out quickly or clay soils that retain too much water.
- Improper Timing: Applying fertilizer at the wrong time can be wasteful or even harmful. For instance, fertilizing late in the season can push plants to produce lush foliage at the expense of fruits, or promote new growth that’s too tender to survive early frosts.
Related Post
- How to Fertilize a Mango Tree Effectively: Tips and Tricks for Healthy Growth
- How to Fertilize Apple Trees: Essential Tips for a Bountiful Harvest
- How to Fertilize Lemon Trees: Secrets for Thriving Citrus
- How to Fertilize Avocado Tree: A Step-by-Step Guide for Lush Growth
Conclusion
Effective fertilization of pepper plants is not just about applying the right type and amount of nutrients; it involves a holistic approach that encompasses proper timing, application techniques, and ongoing plant monitoring. By understanding the specific needs of your pepper plants and adapting your practices according to their growth stages and environmental conditions, you can ensure optimal plant health and maximize your yield.
The key to successful pepper plant cultivation lies in the careful balance of nourishment, vigilant observation, and responsive care adjustments. With the right practices, you can enjoy thriving pepper plants that produce bountiful and delicious fruits season after season. Remember, the best fertilizer for your plants is knowledge, and the best application is through attentive, informed gardening.
FAQs
- What type of fertilizer works best for pepper plants?
For pepper plants, a balanced N-P-K ratio such as 10-10-10 is typically effective. During the flowering and fruit setting phases, switching to a fertilizer higher in Phosphorus and Potassium can help promote robust blooms and fruit development. - How frequently should pepper plants be fertilized?
Pepper plants benefit from fertilization at planting and again every 4-6 weeks during the growing season. It’s crucial to reduce the frequency as the plant nears the end of its growing season to avoid new growth that won’t survive winter. - Can I harm my pepper plants by over-fertilizing them?
Yes, over-fertilization can lead to nutrient burn, where plant leaves may turn yellow or brown and exhibit a burnt appearance along the edges. It can also disrupt the soil nutrient balance and potentially lead to inhibited growth. - What signs indicate a nutrient deficiency in pepper plants?
Nutrient deficiencies may manifest as yellowing leaves (nitrogen deficiency), purplish leaves (phosphorus deficiency), or a scorched look on the edges of leaves (potassium deficiency). - Why is it important to test soil before fertilizing pepper plants?
Soil testing helps determine the existing nutrient content and pH level of your soil, which guides how much and what type of fertilizer should be applied to maximize plant health and fruit production. - How does the pH of the soil affect pepper plant growth?
Pepper plants prefer a soil pH between 6.0 and 6.8. A pH outside this range can hinder nutrient absorption, making nutrients chemically unavailable to the plants, thus stunting growth and reducing yield. - What should I do if I’ve over-fertilized my pepper plants?
If over-fertilization occurs, flush the soil with clean water to help dilute the concentration of nutrients. This can help prevent further nutrient burn and salvage some of the plant’s health. - How should fertilizer be applied to maximize uptake in pepper plants?
Fertilizer should be applied around the base of the plant, avoiding direct contact with the stems and leaves to prevent burn. Using a drip irrigation system or watering after applying granular fertilizer can help ensure nutrients are well absorbed through the roots.
With the right techniques and timing, your pepper plants can reach their full potential. Follow this guide to ensure your peppers are as plentiful and healthy as they can be. Happy gardening!

Benjamin Brooks
Forestry AuthorGreetings! I'm Benjamin Brooks, and my journey over the past 15 years has revolved around the fascinating realms of content creation, expertise in snow clearing, and the intricate world of lumberjacking and landscaping. What began as a simple curiosity about the natural world and heavy machinery has evolved into a passionate profession where my love for crafting words intertwines seamlessly with my lumberjacking and garden skills.


Leave your comment